
The cheddar cheese toastie evokes warm memories of a moment in time, back in the late 1970's when I first came across my first original "Breville" sandwich maker' In those days, a cheese toastie was as exotic as things got!
Nowadays, there is so much more that you can do with a 3-in-1 snack maker. However, the original deep-filled sealed cheese toastie is still the go to snack or supper time treat that never fails to deliver!


For more information on weights, measures and simple conversions in both metric, imperial (and US) read ... DO SPOONS, MILLILITRES AND CUPS ACTUALLY MEASURE UP?


The Cheddar Cheese Toastie
As with all cheese toasties, there are so many different varieties of cheese to choose from that you could literally experiment with different flavours for weeks. However cheddar is more often than not the go to type of cheese for toasties, but even within the cheddar family there are differences, usually due to the length of ageing, from mild to mature and even extra mature.
So, who can resist the mainstay of all sandwiches, the original cheese toastie, with delicious melted cheese oozing from in between two crisp, golden slices of bread.
What you will need for the perfect Cheddar Cheese Toastie
I recommend thick sliced bread, either white or 50/50 white/wholemeal, but the thicker the better. As there are literally only 2 main components to this sandwich (they are both in the title) the toast becomes an integral part itself, and not merely just the 2 slices that the filling goes between. Therefore "super toastie" or "extra thick" sliced loaves are the ones to go for.
For this recipe I have used extra thick white.
The cheddar cheese I have chosen for this toastie is a mature cheddar. I simply prefer my cheese to have a good depth of flavour, but you could literally chose any type of cheddar or whatever you have to hand. As I am always "unready" and can never find the grater (also, I hate grating), I find it much simpler to buy the cheese ready grated from my local supermarket. I always have at least 2 or 3 bags of different kinds of cheeses in my fridge so I'm ready for that midday sandwich or late night snack. These are usually supplied in 200g or 250g bags and often are resealable so you can just use the amount you want and keep the rest for later (up to 5 days so no need for waste).
Although I said this was a two ingredient snack, and that includes the bread, my personal preference is to add a little seasoning in the form of a pinch of ground black pepper to enhance the flavour.
The Recipe
The Cheddar Cheese Toastie
EQUIPMENT
- 3-in-1 snack maker with sealed toastie plates
PREPARATION TIME : 5 minutes
COOKING TIME : 6 minutes (approx.)
SERVINGS : 2
INGREDIENTS
- 4 slices extra thick white bread
- 15g butter or similar
- 70g grated mature cheddar cheese
- pinch of ground black pepper
STEP BY STEP INSTRUCTIONS
- Turn on the snack maker
- While the appliance is heating up gather all the ingredients to hand.
- Butter one side of each of the 4 slices of bread
- When ready, place 2 slices butter side down on bottom plate
- Form a recess with the back of a spoon in the shape of the plate (be careful as the plate is hot)
- Place equal amounts of each grated cheese into the recesses formed.
- Sprinkle a pinch of ground black pepper over the cheese
- Place the remaing 2 slices of bread on top with the buttered side uppermost
- Close the top plate and click the handles to lock in place
- Cook for approximately 6 minutes or until golden
How to make the perfect toastie
I prefer to place the bottom slices of bread onto the bottom plate when ready to create a recess for the fillings. However, you will need to work quickly while building the rest of your toastie as the buttered bottom slice will start cooking immediately and the top slice will only start to cook when the lid is closed.
You can of course assemble the whole thing first and then lift into place. Either way, be aware that the plates are very hot.
Once your toastie is cooked switch off the appliance at the socket. NEVER lift your finished toastie out with your fingers. The plates will still be extremely hot! Always use wood or plastic tools. I use a plastic fish slice and the toastie comes away from the non-stick surface easily.
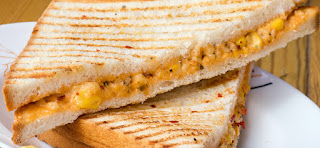
Don't worry too much about excess cheese leaking out as shown in the picture below. This can be due to overfilling or as in this case because the slices of bread were not quite wide enough to extend beyond the recess. The leaked melted cheese tastes great and when cooled, I just pull it off and eat on it's own. Treat it as a bonus, not a problem. 😀
Or you could try...
If you wanted to spice things up a bit, you could try substituting the ground black pepper for some dried chilli flakes to give the whole thing a kick! Or you could go even further by putting a couple of drops of tabasco sauce in each section, but beware. Don't go overboard as you want to taste the cheese and not just a fiery burning sensation with every bite.
For a more subtle variation, try half a level teaspoon (7ml approx.) of tomato ketchup in each filled section to add another complimentary layer of flavour to this delicious combination.
Perfect with...
The Cheddar Cheese Toastie is perfect on it's own as a snack at any time of day, whenever the fancy takes you.
Or simply add some fresh cherry tomatoes and baby salad leaves, to create a quick tasty lunch for two.
How does your sandwich maker compare?
For most of the recipes shared here I use my trusty Tower Deep Fill 3-in-1 Sandwich Maker, so obviously you may need to adjust your ingredients slightly if you are using a different appliance. Having said that, most sandwich makers are very similar in design and size, and the amount of each filling is a guide only and you can increase or decrease, add or subtract, according to your personal taste.
Never be afraid to experiment, and remember you won't always get the perfect result first time, so if at first you don't succeed try, try and try again. It's great fun!
If you want to check out some of the alternative 3-in-1 machines available check out our guide...


Comments
Post a Comment